I’ve Bought a Fuji GFX 50S II for Landscape Photography

I’ve been using Fujifilm X Series cameras for a number of years now and they have served me really well. I like their build quality, I own a number of XF lenses which I really enjoy using and very importantly they help produce lovely photographs. Quite a few months ago now I decided that I required a second camera and I wasn’t short of options or possible contenders. Considering my love for the Fuji X Series cameras, and the lenses that I already had, some of the latest X series models really appealed to me. I gave a lot of thought to the X-H2S, X-H2 and the X-T5. To be honest I would have been happy with any of these cameras and I do hope to own one in the future. However when purchasing my latest camera I had one goal in mind and that was to purchase the camera which I thought was best for my needs and ultimately the best for landscape photography.

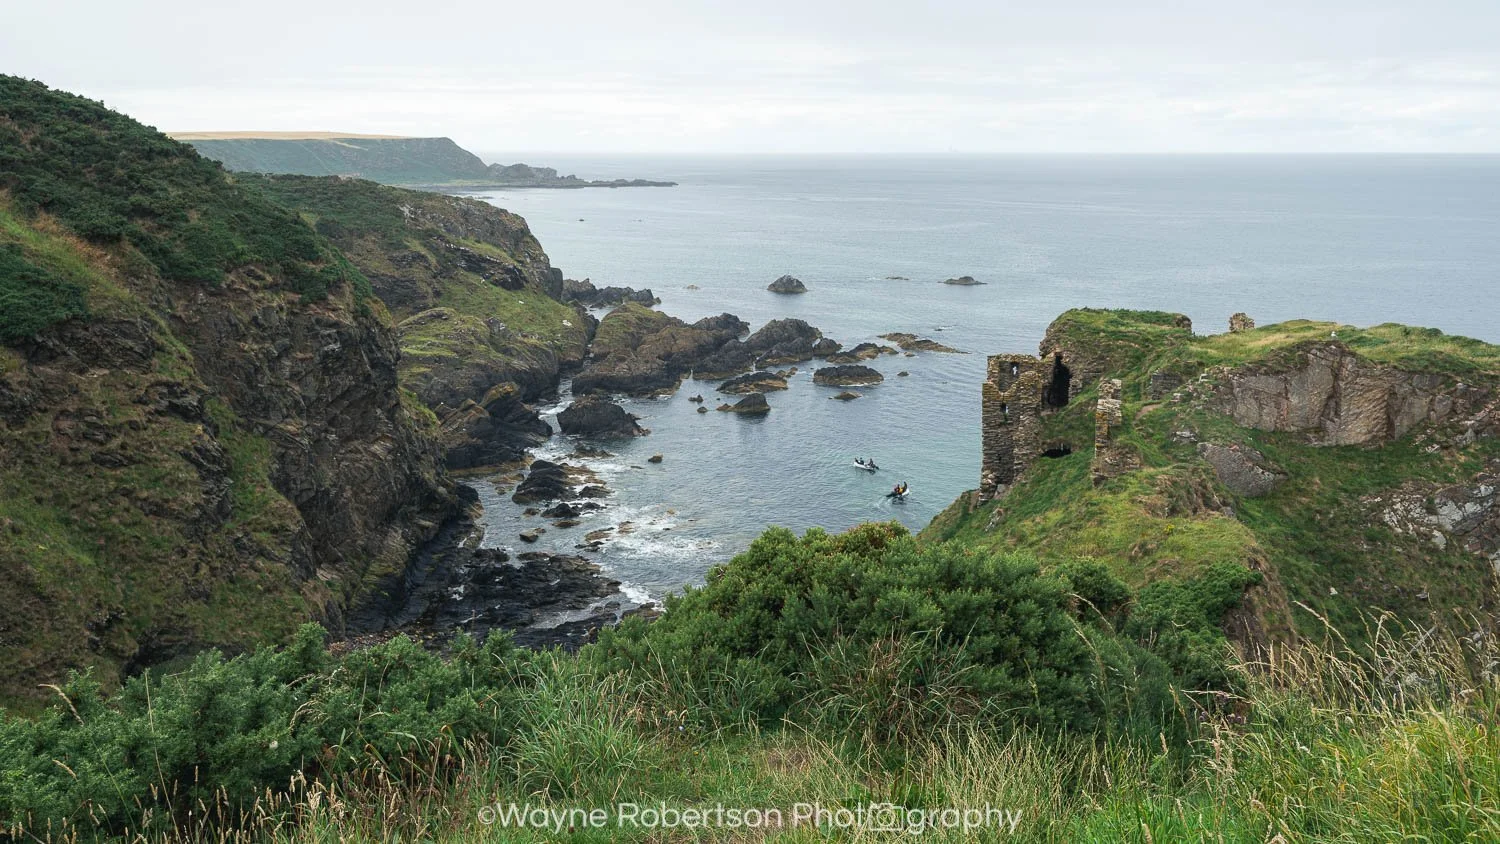
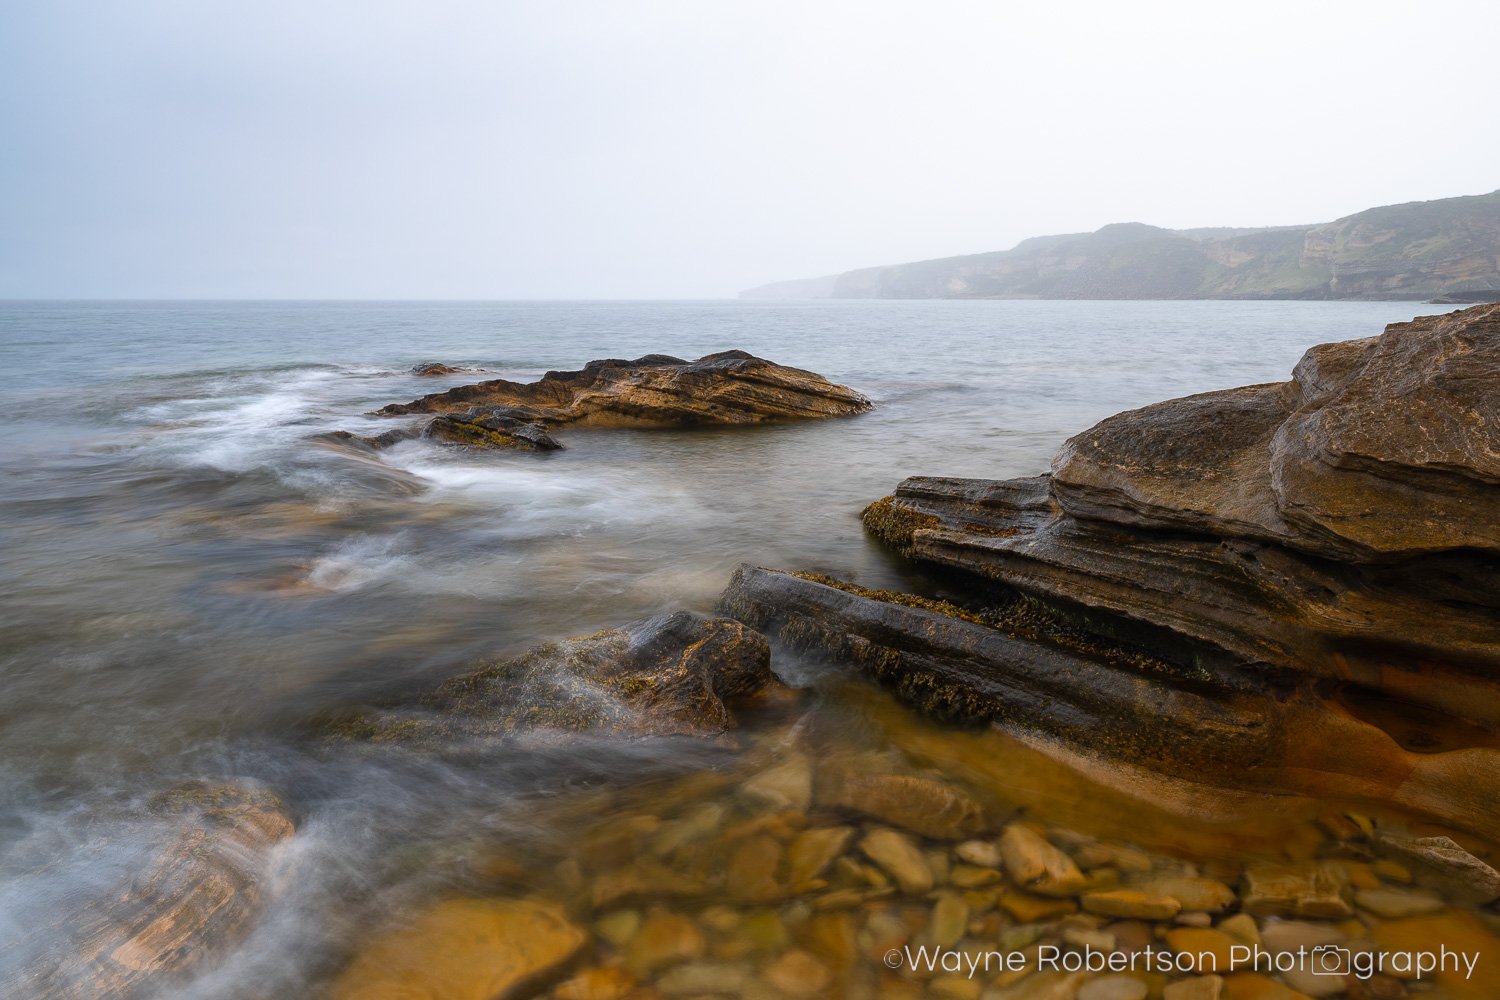
Photograph captured using my GFX 50S II.

I spend most of my time doing landscape photography but I also have a love for, and spend a lot of time doing, wildlife photography. I consider myself to be a photographer but I also record video as well. Considering all of this, if I had wanted a camera that could do all of these really well then one of the X series models would have been my best choice. As already mentioned though I wanted to purchase a camera which would be used for landscape photography the majority of the time and that led me to the Fuji GFX line-up of cameras. It is my opinion that these medium format cameras are a fantastic choice for the landscape photographer; amongst other things they capture tremendous amounts of detail, they can capture significant dynamic range in a single exposure and images taken with these cameras show beautiful tones and colour. Not everyone may need or benefit from these features but for those who could then the GFX cameras should help deliver them.

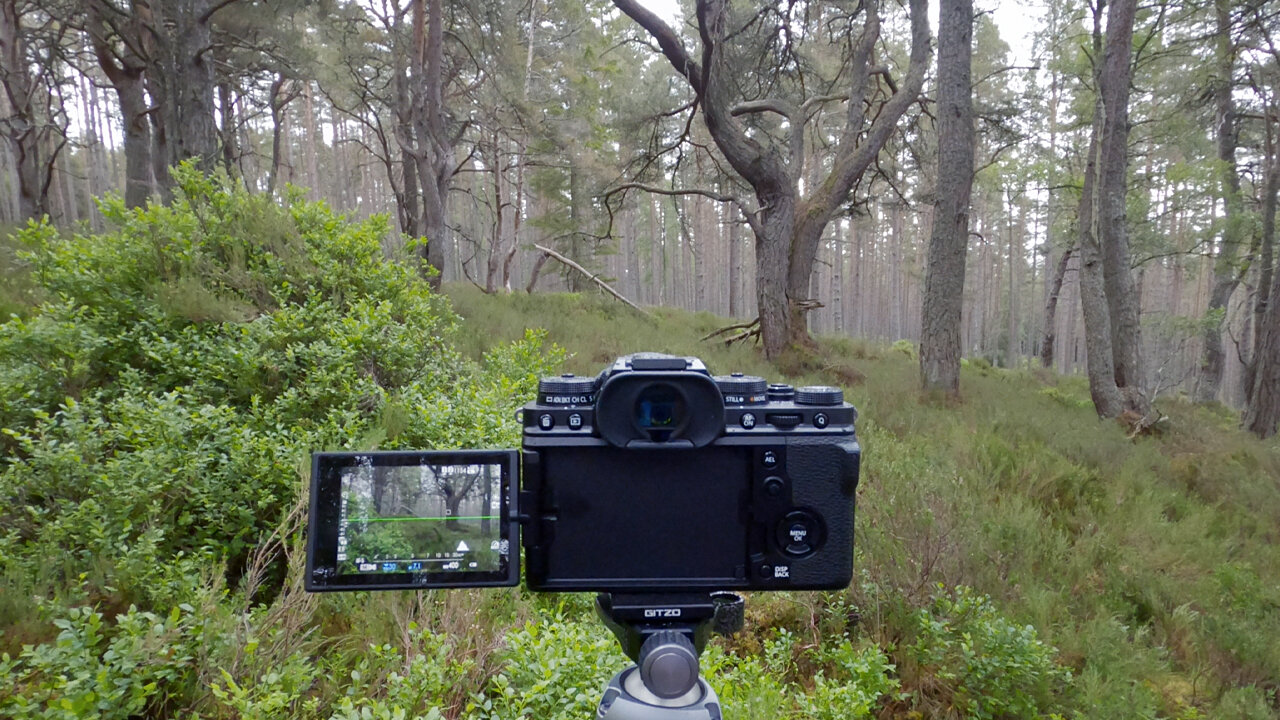
With a number of choices available I ended up purchasing the Fuji GFX 50S II. I felt that the 51.4MP offered by this camera would be ample for my needs and in a camera which I’d be using 99% of the time to take photographs video capabilities did not concern me. Having a camera body offering up to 6.5 stops of image stabilisation suggested taking some shots handheld would definitely be an option and having a LCD screen which tilts in 3 directions was sure to be very useful for me when photographing landscapes.

I’ve now been using the camera for many months and have captured a lot of photographs with it. This short blog article is definitely not a review but I am happy to say I am delighted with my choice. Ultimately we need to buy gear which is right for us and I am confident that I have. If you’d like to hear a bit more about why I bought the Fuji GFX 50S II and listen to my advice and suggestions when it comes to buying cameras then you can watch my YouTube video here. But what about my X Series camera? Well my Fuji X-T3 remains with me and will still be used. Ultimately I’d like to upgrade it to one of the newer X Series models but that is for the future …

Fuji XF 150-600mm Lens - First Wildlife Shoot, First Impressions and Full Review

The Fuji XF 150-600mm lens, box and accessories.

Having used the Fuji XF 100-400mm lens extensively for my wildlife and landscape photography I was very excited to hear about the launch of the Fuji XF 150-600mm F5.6-8 R LM OIS WR lens. While I had no complaints about the super telephoto lens that I already owned, in my mind the Fuji XF 150-600mm would offer me a number of benefits:

  1. Longer maximum focal length

  2. Internal zoom

  3. Less reliance on a teleconverter

  4. Even better image quality in some scenarios due to newer lens design and less use of a teleconverter

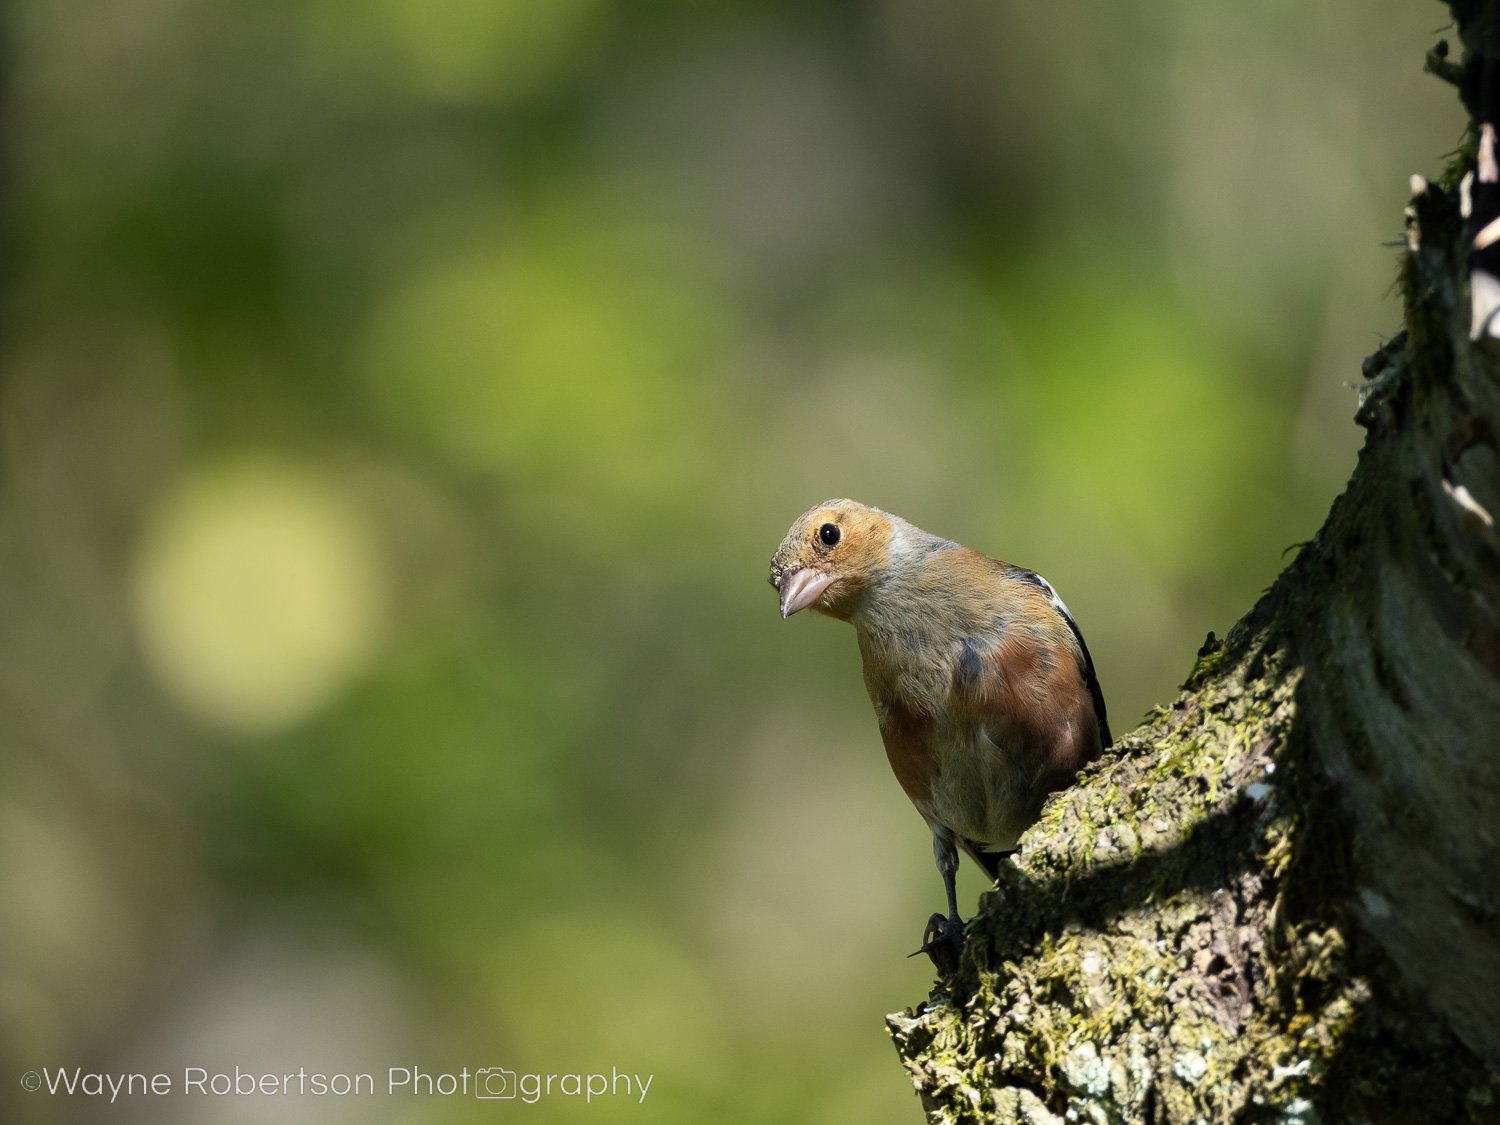
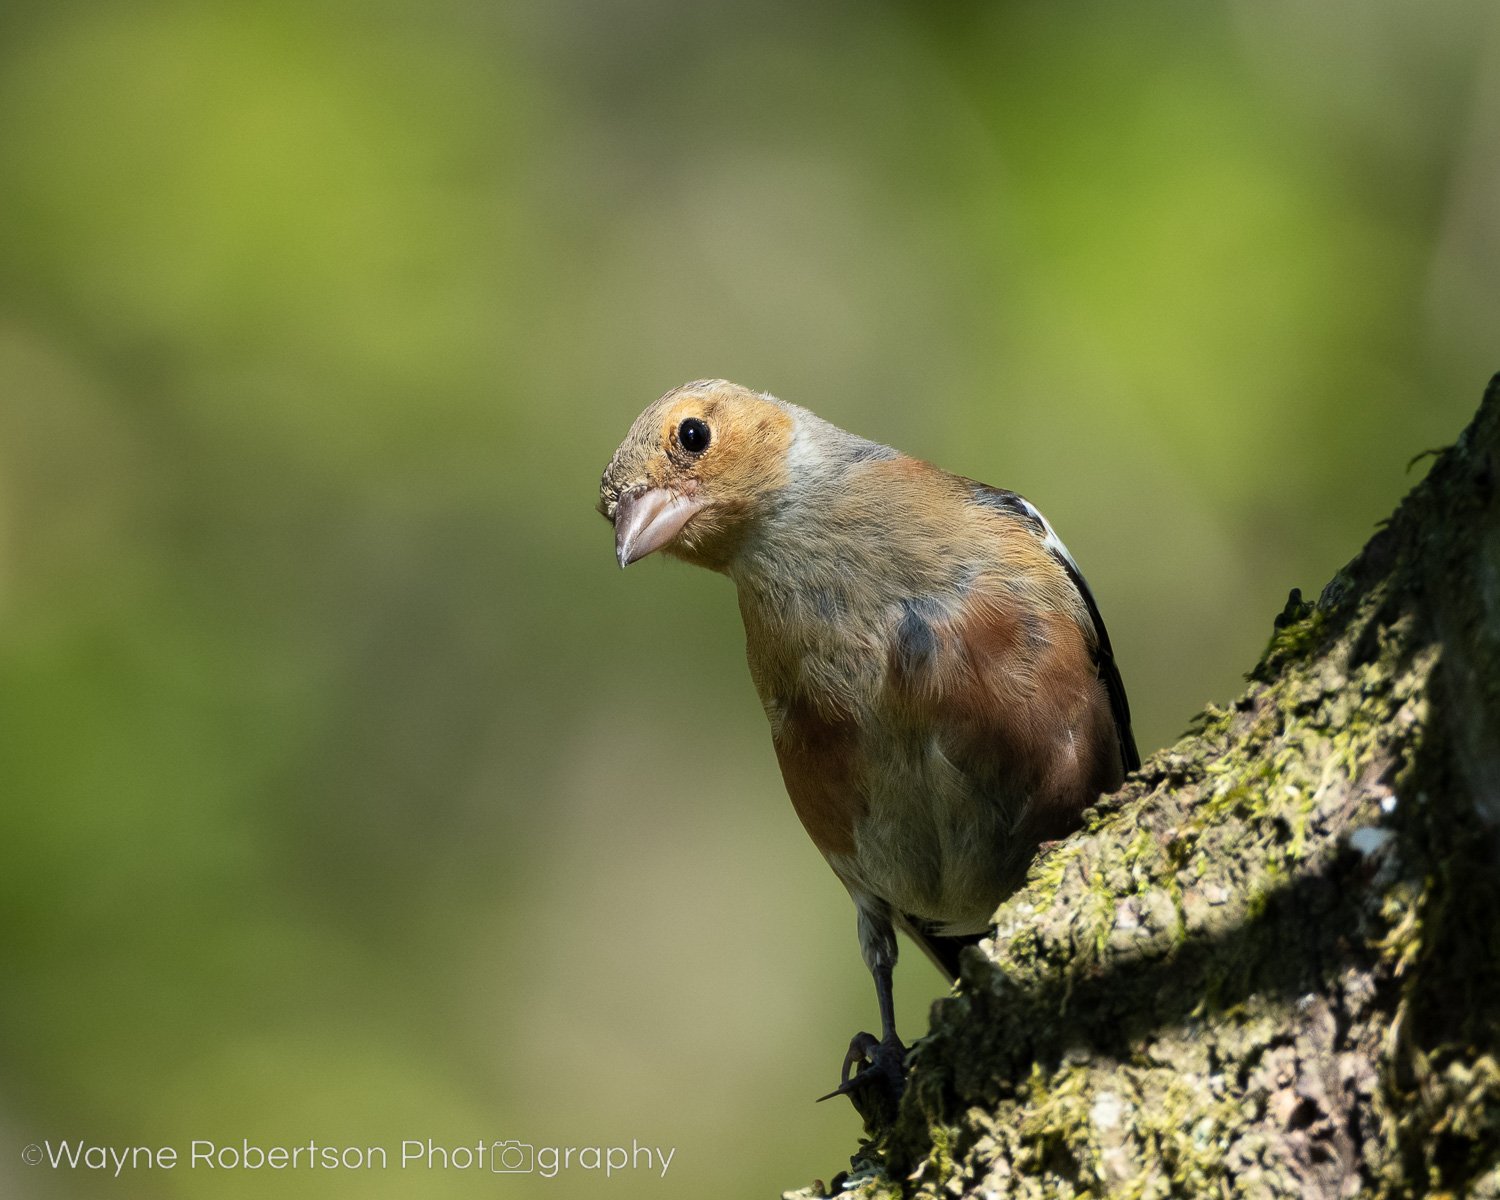
With this in mind I pre-ordered the lens, received it at launch and headed out to see what wildlife I could find to photograph. Below is a female Chaffinch which is one of the first images I captured using the new lens. The first image shows my preferred crop (a minor aspect ratio change from out of camera), the second is a smaller crop of the same image to show more of the detail on the bird:

When reviewing this initial image in my editing software I was very pleased with the sharpness and detail that was captured. Unfortunately the “internet” versions shown here are lower quality than my RAW files but hopefully they show some of the capabilities of the lens.

While on location with this lens I was using the Fuji X-T3 camera body. Most of my time was spent photographing static birds as there was lack of birds in flight that were suitable subjects. In the static scenarios I was presented with I felt that the autofocus found my subjects quickly and accurately and this helped me get a number of photographs that I am pleased with. As any wildlife photographer will know, small birds perched on a branch, object or on the ground can still prove difficult for both photographer and camera due to their small size, foliage and other obstructions, changing light and because they often don’t stay in the same spot for long. In my very limited opportunities to photograph birds in flight again I felt the camera and lens combination did a good job; although I was only out to test the lens I was able to capture some sharp images of gulls that flew past. I would love to try the Fuji XF 150-600mm F5.6-8 R LM OIS WR with the newly released Fuji X-H2S camera as I feel this combination may offer some benefits for wildlife photography, focusing and tracking birds in flight etc.

A young Great Spotted Woodpecker captured on Fuji X-T3 and XF 150-600mm lens.

Throughout my first shoot I felt that my new lens performed very well and I was comfortable using it handheld for most of the time that I was out. It comes with a strap which is very comfortable and the lens is well balanced which is an asset for both handheld and tripod use. The zoom ring is nice and smooth, as is the aperture ring which has a nice soft click to it as it is turned. On my first shoot I did not use the focus ring as the autofocus worked very well for my needs. At the front of the lens are four focus control buttons which I found quite useful and I am sure these will get a lot of use from me when photographing wildlife.

Chaffinch captured on Fuji X-T3 with XF 150-600mm lens.

Towards the end of my shoot dropping light levels resulted in me having to use higher ISO values to get the correct exposure on my photographs. With a camera such as the X-T3 this is not such an issue as it once was and I was still able to capture very good quality images. The following image of a female Great Spotted Woodpecker was captured using ISO 2500. In wildlife photography terms this is not an excessively high ISO but it was still a reasonable test of image quality on the Fuji X-T3 with the XF 150-600mm lens. Having looked closely at the image I am really pleased with the result, the noise is very manageable (thanks to the camera sensor) but what I was most keen to inspect was the detail captured on the bird at this ISO level. The fine, small details have been captured sharply - a very good result considering the overcast conditions and my camera settings.

Female Great Spotted Woodpecker captured on Fuji X-T3 with XF 150-600mm lens.

Overall I am very pleased with the Fuji XF 150-600mm F5.6-8 R LM OIS WR lens based on my first shoot. It is a very manageable weight considering the focal length it covers, and due to the internal zoom it feels well balanced. In my opinion it has helped produced some very sharp and detailed images with pleasing colours and I am looking forward to using it again soon.

I have produced a video showing my first shoot with this lens which is available on my YouTube channel Wayne Robertson Photography. You can watch the video by clicking here. Also, a few weeks after my first shoot, I’ve now published my full review of the Fuji XF 150-600mm lens. My review contains lots of information about the lens and shows 27 photographs and 7 videos captured using this lens. The review is available to watch here. If you’d like to see my future wildlife and landscape photography shoots with this Fuji lens then be sure to subscribe to my YouTube channel.

Kase Tripod Leg Covers Review

As a landscape photographer and wildlife photographer my tripod is an essential part of my gear. I take it almost everywhere and it is used in a wide range of environments. Some of these, especially the coast, can be harmful for a tripod in terms of its overall condition and functionality.

To get “the shot” sometimes it is necessary to have my tripod legs deep in sand or the sea and my tripod is not too fond of either of these situations! This is where the Tripod Leg Covers by Kase are very useful and form a protective barrier between my tripod and the elements.

Kase Tripod Leg Covers Review

Testing the Kase Tripod Leg Covers in my YouTube video (see below).

The leg covers are waterproof and wear proof. They are easy to slide onto your tripod legs and are held securely by some drawstrings at their opening. The base of the covers (which contact the ground) are made of thicker material than the rest of the covers which is a sensible decision to increase durability and wear resistance.

Image captured while testing the leg covers. Shot on Fuji X-T3 using Kase filters.

I recently tested these covers at the coast and they helped me capture the photograph above. All three of my tripod legs were deep in the sea protected by the leg covers. After capturing my photograph I wasted no time in removing the covers to check the condition of my tripod… I was delighted to find that no seawater and no sand had made their way through - my tripod was clean and dry!

To watch my full test and review of the Kase Tripod Leg Covers, and find out more detail about these such as their length and how you can adjust your tripod when they are on, you can watch my YouTube video review here.

The Damage Storms, YouTube, Instagram and Social Media Can Do to the Landscape

Woodland on a fog filled morning.

As I write this Storm Corrie and it’s almost 60mph winds batter my house. Apart from a short trip out it’s another day indoors for me editing some photographs and catching up on some other work. I can’t help but think of the damage this storm will cause to people, property and of course the landscape. I’ve already seen more trees destroyed and of course storms Arwen and Malik took their toll too. The change to areas we live in, visit and perhaps photograph will be lasting. Storms aside, as a landscape photographer never do a few days pass without me pausing to think about the potential damage my outdoor photography could cause.

I’m very aware of the potential damage my own feet could cause to the landscape - what is under and around them. I always take great care but even in doing so if I visit the same place a few times within a short period I can have an effect on that specific area. In recent months I’ve visited some reasonably well known areas that I have been to before. Though not long had passed since my last visits I noticed the new damage done to narrow access roads which are simply not capable of supporting the high volumes of traffic they have seen. I saw cars and larger vehicles parked (or perhaps abandoned?) at the side of narrow roads as people ran out to take photographs. Roads, verges and vegetation all suffer. It’s not only roads that suffer, very similar damage happens to footpaths and the landscape itself. Even if I and others take care sometimes the sheer amount of footfall is enough. Of course when we wander off path new paths begin to form and others follow. It is becoming increasingly more common for me to read and see in the news, and witness for myself, the damage done to some areas due to them being unable to cope with large visitor numbers. Unfortunately I’ve also seen areas being damaged deliberately to make them more photogenic, and of course litter and waste is often an issue too.

While I have every confidence that the vast majority of us take great care and appreciate and respect the areas we visit, it’s a fact that a large number of visitors is enough to have an impact. Wildlife and people who live in the areas we visit are all impacted. But how does this relate to outdoor photography? As a photographer and someone who loves the outdoors an issue that I often find myself struggling with is because of the popularity of the internet, social media, and the sharing of photographs and video. Should a photograph or landscape/wildlife photography video which identifies the location of the content become very popular, it has the potential to make hundreds of thousands of people, if not more, want to visit that location. It’s impossible for me to put exact numbers to this in terms of how many people will actually visit that location, but the audience of photographs and videos does in some cases reach millions of views. I know beyond any doubt it has increased the visitor number to many many areas exponentially.

I’m not an expert on this matter, I’m just someone who cares about these issues. I care about the landscape, wildlife and the people who live in these areas and I feel that these three things don’t always want or benefit from the popularity the internet, photography and video can bring. For me these three things need to be prioritised over photography and business. I’ll continue to quietly do my best to minimise the effects of my own photography. If anyone were to ask me what can we do about this, my simplest answer is: “Think before you share”. Before you post your next photo or video online pause and think what could be the potential effect of sharing the location information? Thank you for taking the time to read this! Even if it makes a difference to only one person that is a positive result. If you are interested in this topic and want to hear more I have a video on my YouTube channel here.

#naturefirst

The Best Camera Settings for Landscape Photography

A question I often get asked is “What settings did you use to take that photograph?”. I understand the curiosity. However, I feel the important part of camera settings is to understand what they do and how to use them, rather than know the settings a photographer used for a specific image - the latter really won’t help anyone much.

Discussion around camera settings for landscape photography is mostly focused around the exposure triangle - ISO, Aperture and Shutter Speed. We need to understand how each of these three settings influence our exposure but also how they control the overall appearance of the photographs we take. Our cameras have many settings but I also like to draw peoples attention to Focal Length when thinking about which Aperture to use. Focal Length, along with other factors, affects Depth of Field.

I talk through how I decided on the camera settings for this image here.

As a guideline, when taking landscape images I try to:

  1. Keep ISO as low as possible to give me the best image quality

  2. Use an Aperture which gives me the desired Depth of Field for the scene I’m photographing

  3. Use a Shutter Speed which helps create my vision for the photograph (be it having all motion frozen and appear sharp, or show some movement e.g. in water)

  4. Keep in mind the Exposure Triangle and adjust settings as necessary to create the correct exposure

If you see a photograph and the camera settings used are visible, there is often no useful information to be gained from knowing those settings which were used by the photographer. It may be interesting but for them to mean anything you’d have had to be there with the photographer, know which type of camera they used (e.g. full frame, medium format), where they focused, the distance in the scene, how fast any movement was (e.g. tree movement, water flow), what their vision was for the photograph, which filters were used (if any) and so on. It is also important to realise that a different combination of settings could have been used to produce another photograph of the same scene, taken at the same time, and to the end viewer it would look the same.

My advice is to learn what ISO, Aperture and Shutter Speed do and I have a video which can help you do this. I talk through the settings I decided to use for a number of photographs and most importantly why I chose those settings. You can watch the video on my YouTube channel here.

How to Achieve PERFECT FOCUS for Landscape Photography

You have a great composition. The scenery is beautiful as is the light. You know where to focus to get the sharpness that you require. The clouds move into the perfect position and you release the shutter. You are feeling great and you’ve captured a photograph that you are proud of!

Or at least that’s what you think … Have you ever arrived home eager to inspect your photograph on a larger screen only to find that your photograph isn’t as sharp as you’d like, or that the wrong part of your photograph is in focus? Unfortunately this can ruin what you thought would be a fantastic photograph.

When taking a photograph it is vital to ensure that your camera is correctly focused on your chosen spot within the landscape. Typically landscape photography offers us the luxury of allowing us enough time to check our focus before we press the shutter button, but sometimes we need to react very quickly to what is happening in front of us and we just need to take the shot as best we can. I’ve recently released a video on my YouTube channel covering these scenarios in detail and showing how I focus my camera in each case.

The video covers:

  • How I focus when I need to react quickly

  • How I focus when I have time to ensure perfect focus

  • I discuss how autofocus can fail and when/how I use manual focus

  • I give a number of other tips on assisting with and checking focus

A beautiful sky and dramatic waves. I didn’t want to miss this shot so I took the necessary time to ensure my camera was perfectly focused on my chosen spot using a technique covered in my YouTube video.

A beautiful sky and dramatic waves. I didn’t want to miss this shot so I took the necessary time to ensure my camera was perfectly focused on my chosen spot using a technique covered in my YouTube video.

In the video I use a Fuji X-T4 to demonstrate my techniques and I also give some tips that are specific to that camera, however most of what I demonstrate and my techniques can be done on other cameras too. Be sure to check out my video here. I’m sure you will find it a worthwhile watch and you will have more confidence in how to focus for landscape photography.

TIP: I’d like to finish this article with an important tip. Always take a few moments to review your photographs as you take them while on location. Zoom in to 100% magnification and scroll around your photograph to ensure it is sharp in all the areas that you want it to be. It’s much better to notice any issues regarding focus (and sharpness) while on location rather than when you get back home!

Landscape Photography with the Fujinon XF100-400mm F4.5-5.6 lens - Super Telephoto Landscape Photography

Many photographers will own a telephoto lens for their landscape photography but a super telephoto lens definitely offers some additional and exciting opportunities. I use the Fujinon XF100-400mm F4.5-5.6 lens for both wildlife and landscape photography. I suspect most Fuji users purchase the lens for photographing wildlife or sport but it’s a fantastic lens for landscape photography too.

Atmospheric mist across the landscape. Captured with Fuji X-T4 and Fujinon XF100-400mm F4.5-5.6 lens.

Atmospheric mist across the landscape. Captured with Fuji X-T4 and Fujinon XF100-400mm F4.5-5.6 lens.

With the versatile focal length range extending to 400mm I can pick out compositions in the distant landscape which would otherwise be unobtainable. However it is not all about zooming in to the distant scenery, a long focal length is is also very useful for photographing small sections of a landscape, or isolating a single subject such as a tree or much smaller parts of a scene such as a few leaves on a branch.

Beautiful light on a distant section of the landscape. Captured with Fuji X-T4 and Fujinon XF100-400mm F4.5-5.6 lens.

Beautiful light on a distant section of the landscape. Captured with Fuji X-T4 and Fujinon XF100-400mm F4.5-5.6 lens.

The standard downside to many super telephoto lenses are their size and weight. Normally I will make an informed decision to carry only the Fujinon XF100-400mm F4.5-5.6 lens when I feel it is the best lens choice for what I want to photograph on a specific day. Compared to other super telephoto lenses I have owned I find its size and weight to be very manageable.

If you’d like to see how I spend a day with my Fuji X-T4 and Fujinon XF100-400mm F4.5-5.6 lens, see the images I capture, and hear some tips for landscape photography with a super telephoto lens, you can watch a video I have created on my YouTube channel here.

My Limited Edition Prints - Landscape and Wildlife Photography from Scotland

I’ve recently added some new limited edition prints to my Shop. These are some of my favourite photographs that I’ve captured over a number of years from across Scotland. All my images are captured, printed and checked by myself. Other than the time spent capturing these photographs I enjoy taking considerable time to ensure the final prints are just right. Each photograph is printed on archival quality paper with inks which ensure it will retain its original colour quality and look for essentially a lifetime. I also include a certificate of authenticity.

Why not take a look through my prints, I’m sure you will find something that you’d get years of enjoyment from hanging in your own home. Whether a foggy woodland, a snow covered vista, a seascape, a beautiful view from the Isle of Skye or a box set containing a few prints, I hopefully have photographs for sale that will resonate with you.

Below is one of the new prints that I have recently added. This is one of my personal favourites. It is an image I visualised many years before I was able to actually capture it. I wanted to photograph this tree during heavy snowfall and it was a delight to finally see that moment years after first having the concept. The image looks wonderful in print and is a faithful representation of what was a special and very rare moment.

Landscape 1.jpg

Fuji X-T4 and Fuji XF100-400mm Lens - First Wildlife Photography Shoot

Ever since switching to the Fuji line of cameras I have had my eye on the Fujinon XF100-400mm F4.5-5.6 lens. As someone who loves wildlife photography this lens seemed perfect for my needs offering a great focal length range which can be extended further by using one of the compatible Fuji teleconverters.

I’m happy to say that I have now purchased this lens along with the Fuji XF1.4X teleconverter; when using this teleconverter the lens has a maximum focal length of 560mm on my X-T4 which is fantastic for photographing wildlife. Note: when using the teleconverter the aperture becomes F6.4-8.

For my first shoot with this lens I headed out on an evening to try and find some roe deer to photograph. The conditions were quite challenging with a strong wind blowing and of course the ever decreasing light as the evening headed towards sunset. I found some roe deer near a corn field which made for a wonderful setting for photographs as the corn blew in the wind. Despite the aforementioned challenges the lens performed really well and I was able to get some photographs that I was very pleased with. Excited to try the lens more I headed out again the following morning and captured some nice photographs of deer in the golden morning light.

So what do I think of the Fuji XF100-400mm lens based on my first few hours using it? I’m very impressed with the lens. Obviously I can’t yet speak about it in a long term capacity but the build quality seems excellent and I found the size and weight very manageable for a lens offering this focal length range. I am very happy with the image quality - the photographs I took show great detail and look very pleasing. When using the 1.4X teleconverter I found the loss in sharpness to be minor and this makes the teleconverter a great choice when the extra focal length is beneficial.

If you’d like to watch the video I made of this shoot which includes plenty photographs taken with the lens and teleconverter, and also video footage captured using the lens, then be sure to checkout the video here on my YouTube channel.

Short-term Review of the Fuji X-T4 Camera

As I write this article I have now owned my Fujifilm X-T4 for just over three months, I’ve used it a lot mainly for photography but also for creating video too. It seems like the perfect time to sum up my initial thoughts and experiences with the camera so let’s get started…

Out of the box the newer model still feels very well made but also feels more comfortable to hold in the hand due to subtle size and design changes. The familiar Fuji dials on top for changing ISO, shutter speed and exposure compensation are still present and I appreciate the new switch which enables me to change between shooting stills and video quickly and easily. A high degree of customisation is possible allowing the photographer to specify which action various button presses on the camera perform, and also actions can be assigned to swipe gestures on the rear screen.

The New Rear Screen

A new feature on the X-T4 which has proven divisive is the rear screen which is now fully articulating. I can definitely understand the mixed opinions on this…

My Fuji X-T4 with the new design rear screen

My Fuji X-T4 with the new design rear screen

I really liked the screen design on the X-T3, I felt it was perfect for photography. However it is important to me that I am able to use my camera to record video too, and because some of that is recording myself it is a significant benefit to be able to see the screen and my composition, exposure etc. when I am facing the camera. With the X-T4 that is now possible. So for that reason alone I do prefer the new screen design over what was previously available on this line of Fuji cameras. In addition to this the screen itself is better, although I could not compare it side by side with the X-T3 I feel the higher resolution is making it easier for me to check my photographs are in focus and to see finer details when looking at a composition.

BUT it is not all perfect… A common problem with this design of screen is that their range of motion can be restricted when using a L bracket. Many landscape photographers use a L bracket and they work much better alongside the type of “tilt” screen found on the X-T3. As I write this a few companies are selling L brackets but I have not yet found a X-T4 specific one that is the ideal solution - manoeuvrability of the rear screen is restricted to some degree on all models. This is definitely a drawback and a frustration but not a fault of the camera itself. L bracket issues aside I really like the new screen for my needs.

IBIS (In Body Image Stabilisation)

Another new feature on the X-T4 that I am finding really useful is IBIS. As someone who spends most of his time capturing landscapes with my camera on a tripod I don’t think this is an essential feature, but I’ve definitely used and benefited from it over the last few months. I’ll continue to use my tripod the vast majority of the time but having IBIS has encouraged me to take a few more shots (when suitable) handheld. I have made a few videos on my YouTube channel Wayne Robertson Photography testing IBIS on the Fuji X-T4, and also one discussing how IBIS helped me in two ways to capture a specific photograph. Feel free to watch those to get a lot more information on this topic.

IBIS Videos:

Fuji X-T4 IBIS Test For Photography - How Good Is It?

Fuji X-T4 IBIS Test For Photography With Fuji XF14mm Lens

How IBIS on the Fuji X-T4 Helped Me Capture This Photograph

Fuji X-T4 IBIS Video on my YouTube Channel

Fuji X-T4 IBIS Video on my YouTube Channel

Autofocus

I’m finding that autofocus on the Fuji X-T4 works very well for me when taking photographs but I would like to see a performance improvement when I’m in front of the camera recording video of myself. The X-T4 offers both face detection and eye detection which have the potential to be very useful for people like myself when recording video, however I find they are currently (at the time of writing) not working quite as well as I’d like. When using continuous autofocus the camera seems to have a tendency to occasionally lock onto a subject which is not a face or eye. Fuji has released a number of firmware updates for the X-T4 which appear to have improved the autofocus in this type of situation, and it’s certainly not bad, but if it could be improved just a little bit more I’d be delighted. As is it still performs well and the X-T4 is an excellent camera for producing high quality video.

Final Thoughts

Prior to purchasing the X-T4 I used the X-T3, the experience of using both cameras is very similar but I feel the X-T4 is definitely an improvement overall. How much of an improvement it is depends on your own individual needs but for mine (using it mainly for photographing landscapes and wildlife and video creation) it was definitely a worthwhile upgrade. I’ve been getting some great results when photographing wildlife (more of that to come in future videos on my YouTube channel) and the overall size and weight of the X-T4 partnered with a suitable lens makes it a great and manageable setup for wildlife photography.

Some Photographs I’ve Captured With My Fuji X-T4:

Landscape 1.jpg

The improvement in battery life over the X-T3 is noticeable and very welcome. Although the sensor has not been upgraded for the X-T4, image quality when partnered with my Fuji lenses remains excellent and it takes photographs that I am very pleased with. I find the look and feel of Fuji cameras to be very welcoming and it makes them a pleasure to use and in that respect the X-T4 is no different - it is an excellent camera which helps produce fantastic photographs and video and lets us enjoy the experience while doing so.

I've Switched to the Fuji X-T4

When I learned that the Fuji X-T4 was to be released and I read its specifications I thought it would be an excellent camera. However, due to having very recently bought a Fuji X-T3, I didn’t think I would buy one. Due to some unusual and unexpected circumstances I have ended up buying a X-T4, if you’d like to hear the story behind this and see my first images and video taken with my X-T4 you can watch the video on my YouTube channel here. In that video I also cover some of the main features of the X-T4 that I feel will benefit my photography and video making.

Due to the current virus situation I am unable to head out as normal and take landscape images so I can’t yet use the X-T4 as I would like. However I have been trying the camera indoors and in my garden and so far I am very impressed. It has built upon the very solid foundation of the X-T3 and added some new features which personally I will find very useful. In terms of shape and size the design changes are subtle yet noticeable and it feels a little bit more comfortable to hold and use. I feel very much at home with using the camera coming from the X-T3.

Some of the main features that have stood out to me so far are:

  • The Rear Screen - although I really liked the X-T3 screen, overall the X-T4 design is more useful to me because I record video. Also the higher resolution means it is nicer to look at and helps when checking focus etc.

  • New Battery - longer life, less changing batteries and I won’t need to carry as many batteries.

  • IBIS - I spend most of my time doing landscape photography and nearly always use a tripod, but IBIS now means that there will be times I can get the shot I want handheld.

  • Improved Autofocus - this will be very useful in my wildlife photography and for video making.

  • Mechanical Shutter - it is now quieter, has a longer lifespan and has higher FPS in continuous shooting mode which will benefit my wildlife photography.

  • Stills and Video - clearer separation of stills and video and the settings and preferences for each.

  • Timer Settings - it is now possible to store your timer settings which I couldn’t do on the X-T3 e.g. the camera can optionally remember, even when switched off, that I had the 2 second timer activated. It is possible that Fuji could add this to the X-T3 in a future firmware update.

Be sure to watch my first X-T4 YouTube video linked above if you’d like to hear some more of my initial thoughts on the camera and see my first images and video.

#fujifilmx_uk #fujixt4 #fujifilm

The first image I captured with the X-T4 and XF16-55 lens in my garden.

The first image I captured with the X-T4 and XF16-55 lens in my garden.

Kase Wolverine Magnetic Circular Filters Professional Kit Review

When heading out to take landscape photography images I always take some filters with me, I don’t always use them but they have a permanent spot in my camera bag. Some scenes may not require the use of a filter, but often a scene and the resulting image can be enhanced by the use of appropriate filters. Recently I’ve wanted to reduce the size and weight of the filter kit that I carry with me, I hoped to find some filters which were compact and light but offered high optical quality.

I decided to purchase the Kase Wolverine Magnetic Circular Filters Professional Kit. This small and lightweight kit comes with a carry pouch, polariser, ND filters (3, 6 and 10 stop), adapter ring and a lens cap. The beauty of this kit is that the filters are magnetic - once you attach the adapter ring to your lens the filters simply clip on and are held by magnetic force. This, and the fact they are stackable, makes them very easy to use and saves a bit of time over other filter designs.

Recently I headed out to the coast to try out these filters, what better way to test them than take a few pictures? You can see one of my first images taken with the Kase filters below. I am very impressed with their optical quality, ease of use, and the small compact size of the entire kit. The short version of this story is that they have earned a spot in my camera bag. If you want to see my full review and demonstration of the Kase Wolverine Magnetic Filters, and some more images taken with them, then you can watch my review video on my YouTube channel here.

#kasefiltersuk

Captured using Kase Polariser and 6 stop ND filter.

Captured using Kase Polariser and 6 stop ND filter.

A Fantastic Day of Hiking and Photography in Winter

It’s always nice to capture some good images when we are out doing landscape photography but it is important to enjoy the journey too. I recently did some hiking and photography on quite a tough day, I felt I captured a few nice woodland images and I had a wonderful day even though conditions were sometimes challenging. I took 3 images, you can see one below and all 3 are in my video documenting the day which you can watch here. I found a couple of areas of the woodland which appealed to me so I wanted to capture some of the atmosphere I felt when there in my images. It’s not always easy to do that but hopefully I’ve been somewhat successful. As the day progressed the weather worsened but I was still enjoying my hike so I decided to carry on to my destination even though I knew I most likely wouldn’t be able to capture any more worthwhile images on that day. Reaching the top of the hill felt rewarding and I was glad I made the effort. Anyway, I hope you like the image below and if you want to see the rest that I captured you can watch the video on my YouTube channel. For those who are interested I captured all 3 images on my Fuji X-T3 using the XF16-55mm F2.8 R LM WR lens.

A characterful tree captured on a winters day.

A characterful tree captured on a winters day.

From Canon 5D Mark IV to Fuji X-T3 - Why I Changed Camera

After using my Canon 5D Mark IV for over 3 years I decided it was time to change camera, and I purchased the Fuji X-T3. This wasn’t a decision I made lightly, and it was one I pondered over for many many months. The Canon 5D Mark IV is an excellent camera and with it I had a number of excellent lenses, unfortunately with that comes a lot of weight which isn’t ideal when walking long distances for landscape photography. Also mirrorless technology brings a lot of new features which I felt could benefit my photography, for example the EVF, seeing the histogram in the viewfinder and much more.

One of the first images I captured when testing the Fujifilm X-T3.

One of the first images I captured when testing the Fujifilm X-T3.

So eventually I bought the Fuji X-T3 and two lenses as my initial purchase and began a test period where I put the camera and these lenses through their paces. I wanted to ensure I would be happy with the camera and the quality of images it and the lenses produced. The short answer is that I am.

If you’d like to know the full details of my change, the lenses I’ve bought and why, what I think of the image quality and see some of the first images I captured with the Fuji X-T3 then you can watch my video on my YouTube channel here.

A Guide to Light in Landscape Photography

Landscape 1.jpg

Composition and light are two extremely important components of a good landscape image. There are many different types and directions of light, and light is constantly changing, so it is something we all need to be very aware of as landscape photographers.

Two periods of light that are well known are Blue Hour and Golden Hour. Blue Hour, as its name suggests, produces blue light. However, unlike its name suggests, it doesn’t last for as long as an hour and this light appears just before sunrise and just after sunset. I personally think the blue light is perfect for producing calm, relaxing images. Golden Hour produces a wonderfully warm and soft light which occurs just after sunrise and just before sunset. This light can really enhance the contours and details in the landscape and produces a beautiful combination of light and shadow. Similar to Blue Hour, Golden Hour may not last for an hour depending on the time of year and your location. Of course around sunrise and sunset we can often be treated to a variety of beautiful colours in the sky but it is important to check weather forecasts because the wrong type of conditions can easily prevent the colour and nice light from appearing.

The direction light is coming from can have a big impact on our images. The four most common directions are:

  • Side Lighting - light which is coming into our scene from the left or right

  • Back Lighting - light is coming from behind our subject and towards us as we face our subject

  • Front Lighting - light is coming from behind us as we face our subject and it is lighting our subject

  • Top/Overhead Lighting - light is coming from above

Throughout the main daylight hours we can encounter lots of different weather and lighting conditions - harsh light, flat light, soft diffused light, fleeting light and so on. I’ve produced a detailed video covering everything in this article and much more on my YouTube channel. If you’d like to watch you can find it here. Capturing scenes under their ideal lighting conditions is part of the joy of landscape photography and is a key part of creating successful images, I wish you good luck!

Focus, Depth of Field and Sharpness in Landscape Photography

One thing I see and hear more than anything in landscape photography is people asking how to get their images sharp from front to back. Where should they focus? What camera settings should they use? It is vital to know how to take images that are sharp throughout, but to always have that as your goal can really affect and limit your creativity. Often a scene or subject can benefit from some careful thought regarding which parts of it you would like to be sharp and in focus, and which parts you may want to appear slightly soft or out of focus. This technique can be used to make areas of interest in your image really stand out due to them being sharp and in focus. Also, the creative possibilities are great and a soft foreground or background may give your photograph a unique look and atmosphere. So next time you are out taking some images consider if whatever you are photographing should be sharp from front to back, or could the final image look better if parts of it are soft? If you’d like to hear me talk about this topic a bit more, and see me use this technique to capture an image, you can watch my video here.

Visualisation in Landscape Photography - Tips to Improve Composition and Your Photographs

Visualisation is a very important part of landscape photography. I think you need to be able to see a good image before you can take one. When you arrive at a scene you may know the potential is there for a nice composition but can you see what ingredients are required to make a great photograph? In my latest YouTube video which you can watch here I discuss visualisation in landscape photography, take a look to see me explain how it helped me capture two images that I like. For this article here are a few ideas to get you started on visualising better images:

  1. What does the scene make you feel, is there a story that you want to tell the viewer?

  2. Is the lighting correct for the scene or would it look better at a different time of day?

  3. Could the end photograph look better if captured at a different time of year?

  4. Where do you want to take the photograph from, and which focal length will work best?

Landscape 1.jpg

Landscape Photography Workshops in Scotland

Sometimes a glimpse of light is all it takes to make a scene come alive. I recently spent a day in strong wind and rain exploring and looking for something that would catch my attention. Eventually I found a scene that I really liked and I setup my camera ready to capture it how I wanted. On this stormy, overcast day the sun cast its soft glow on my scene for a few brief moments and I was able to capture an image that I really like. You can watch this here. In other news I have updated my website with details of some landscape photography workshops that I will be running in Scotland. These are in the areas of the Cairngorms National Park, Glen Affric and Torridon. If you’d like to spend a day with me in these beautiful areas, enjoy some wonderful landscape photography, and receive as much or as little tuition as you’d like then you can find out more information in the Workshops and Tuition sections of my website.

The Best Lens Focal Length Range for Landscape Photography

When doing landscape photography we can often walk for long distances and it is important to keep the weight of our camera equipment manageable. Carrying lots of lenses can certainly increase the weight of our camera bags and the effect on our energy levels is noticeable! There will be times we only want to carry a single lens with us to minimise the weight we carry, so what would be the best lens and focal length to carry? This is also a question new landscape photographers may ask before they begin purchasing camera equipment - perhaps you initially only want to buy one lens, so what is the best focal length range to start off with? Have a look here at my video in which I discuss what I think is the best focal length range in a single lens for landscape photography.

Landscape 1.jpg

Camera Settings for Photographing Birds in Flight + Canon 5D Mark IV and Sigma 150-600mm Contemporary Tips

Capturing nice images of birds in flight is a very rewarding experience. To capture good sharp images you need to use the correct settings on your camera and lens. I’ve created a video which covers all the camera settings you need to use for photographing birds in flight, I also gives some tips to help Canon users including taking advantage of custom settings and modifying Canon AF case settings. I also discuss the best settings for the Sigma 150-600mm Contemporary lens. You can watch here.

Wildlife 21.jpg