landscape photography

The Damage Storms, YouTube, Instagram and Social Media Can Do to the Landscape

Woodland on a fog filled morning.

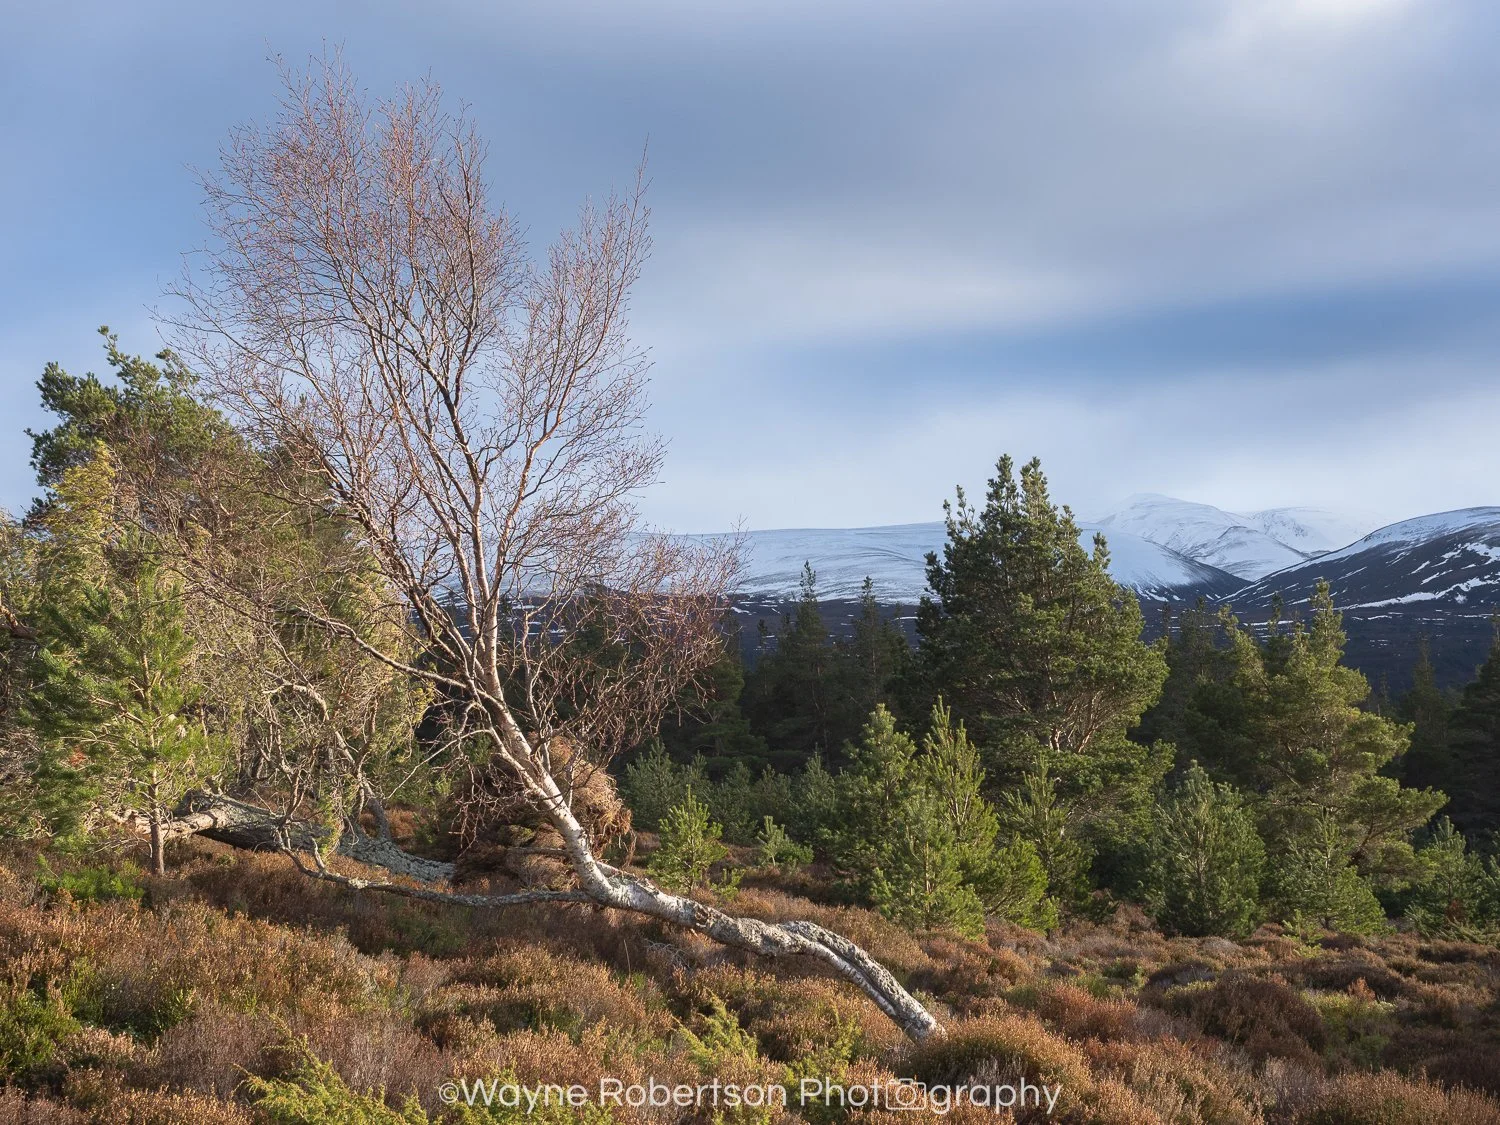
As I write this Storm Corrie and it’s almost 60mph winds batter my house. Apart from a short trip out it’s another day indoors for me editing some photographs and catching up on some other work. I can’t help but think of the damage this storm will cause to people, property and of course the landscape. I’ve already seen more trees destroyed and of course storms Arwen and Malik took their toll too. The change to areas we live in, visit and perhaps photograph will be lasting. Storms aside, as a landscape photographer never do a few days pass without me pausing to think about the potential damage my outdoor photography could cause.

I’m very aware of the potential damage my own feet could cause to the landscape - what is under and around them. I always take great care but even in doing so if I visit the same place a few times within a short period I can have an effect on that specific area. In recent months I’ve visited some reasonably well known areas that I have been to before. Though not long had passed since my last visits I noticed the new damage done to narrow access roads which are simply not capable of supporting the high volumes of traffic they have seen. I saw cars and larger vehicles parked (or perhaps abandoned?) at the side of narrow roads as people ran out to take photographs. Roads, verges and vegetation all suffer. It’s not only roads that suffer, very similar damage happens to footpaths and the landscape itself. Even if I and others take care sometimes the sheer amount of footfall is enough. Of course when we wander off path new paths begin to form and others follow. It is becoming increasingly more common for me to read and see in the news, and witness for myself, the damage done to some areas due to them being unable to cope with large visitor numbers. Unfortunately I’ve also seen areas being damaged deliberately to make them more photogenic, and of course litter and waste is often an issue too.

While I have every confidence that the vast majority of us take great care and appreciate and respect the areas we visit, it’s a fact that a large number of visitors is enough to have an impact. Wildlife and people who live in the areas we visit are all impacted. But how does this relate to outdoor photography? As a photographer and someone who loves the outdoors an issue that I often find myself struggling with is because of the popularity of the internet, social media, and the sharing of photographs and video. Should a photograph or landscape/wildlife photography video which identifies the location of the content become very popular, it has the potential to make hundreds of thousands of people, if not more, want to visit that location. It’s impossible for me to put exact numbers to this in terms of how many people will actually visit that location, but the audience of photographs and videos does in some cases reach millions of views. I know beyond any doubt it has increased the visitor number to many many areas exponentially.

I’m not an expert on this matter, I’m just someone who cares about these issues. I care about the landscape, wildlife and the people who live in these areas and I feel that these three things don’t always want or benefit from the popularity the internet, photography and video can bring. For me these three things need to be prioritised over photography and business. I’ll continue to quietly do my best to minimise the effects of my own photography. If anyone were to ask me what can we do about this, my simplest answer is: “Think before you share”. Before you post your next photo or video online pause and think what could be the potential effect of sharing the location information? Thank you for taking the time to read this! Even if it makes a difference to only one person that is a positive result. If you are interested in this topic and want to hear more I have a video on my YouTube channel here.

#naturefirst

The Best Camera Settings for Landscape Photography

A question I often get asked is “What settings did you use to take that photograph?”. I understand the curiosity. However, I feel the important part of camera settings is to understand what they do and how to use them, rather than know the settings a photographer used for a specific image - the latter really won’t help anyone much.

Discussion around camera settings for landscape photography is mostly focused around the exposure triangle - ISO, Aperture and Shutter Speed. We need to understand how each of these three settings influence our exposure but also how they control the overall appearance of the photographs we take. Our cameras have many settings but I also like to draw peoples attention to Focal Length when thinking about which Aperture to use. Focal Length, along with other factors, affects Depth of Field.

I talk through how I decided on the camera settings for this image here.

As a guideline, when taking landscape images I try to:

  1. Keep ISO as low as possible to give me the best image quality

  2. Use an Aperture which gives me the desired Depth of Field for the scene I’m photographing

  3. Use a Shutter Speed which helps create my vision for the photograph (be it having all motion frozen and appear sharp, or show some movement e.g. in water)

  4. Keep in mind the Exposure Triangle and adjust settings as necessary to create the correct exposure

If you see a photograph and the camera settings used are visible, there is often no useful information to be gained from knowing those settings which were used by the photographer. It may be interesting but for them to mean anything you’d have had to be there with the photographer, know which type of camera they used (e.g. full frame, medium format), where they focused, the distance in the scene, how fast any movement was (e.g. tree movement, water flow), what their vision was for the photograph, which filters were used (if any) and so on. It is also important to realise that a different combination of settings could have been used to produce another photograph of the same scene, taken at the same time, and to the end viewer it would look the same.

My advice is to learn what ISO, Aperture and Shutter Speed do and I have a video which can help you do this. I talk through the settings I decided to use for a number of photographs and most importantly why I chose those settings. You can watch the video on my YouTube channel here.

How to Achieve PERFECT FOCUS for Landscape Photography

You have a great composition. The scenery is beautiful as is the light. You know where to focus to get the sharpness that you require. The clouds move into the perfect position and you release the shutter. You are feeling great and you’ve captured a photograph that you are proud of!

Or at least that’s what you think … Have you ever arrived home eager to inspect your photograph on a larger screen only to find that your photograph isn’t as sharp as you’d like, or that the wrong part of your photograph is in focus? Unfortunately this can ruin what you thought would be a fantastic photograph.

When taking a photograph it is vital to ensure that your camera is correctly focused on your chosen spot within the landscape. Typically landscape photography offers us the luxury of allowing us enough time to check our focus before we press the shutter button, but sometimes we need to react very quickly to what is happening in front of us and we just need to take the shot as best we can. I’ve recently released a video on my YouTube channel covering these scenarios in detail and showing how I focus my camera in each case.

The video covers:

  • How I focus when I need to react quickly

  • How I focus when I have time to ensure perfect focus

  • I discuss how autofocus can fail and when/how I use manual focus

  • I give a number of other tips on assisting with and checking focus

A beautiful sky and dramatic waves. I didn’t want to miss this shot so I took the necessary time to ensure my camera was perfectly focused on my chosen spot using a technique covered in my YouTube video.

A beautiful sky and dramatic waves. I didn’t want to miss this shot so I took the necessary time to ensure my camera was perfectly focused on my chosen spot using a technique covered in my YouTube video.

In the video I use a Fuji X-T4 to demonstrate my techniques and I also give some tips that are specific to that camera, however most of what I demonstrate and my techniques can be done on other cameras too. Be sure to check out my video here. I’m sure you will find it a worthwhile watch and you will have more confidence in how to focus for landscape photography.

TIP: I’d like to finish this article with an important tip. Always take a few moments to review your photographs as you take them while on location. Zoom in to 100% magnification and scroll around your photograph to ensure it is sharp in all the areas that you want it to be. It’s much better to notice any issues regarding focus (and sharpness) while on location rather than when you get back home!

Landscape Photography with the Fujinon XF100-400mm F4.5-5.6 lens - Super Telephoto Landscape Photography

Many photographers will own a telephoto lens for their landscape photography but a super telephoto lens definitely offers some additional and exciting opportunities. I use the Fujinon XF100-400mm F4.5-5.6 lens for both wildlife and landscape photography. I suspect most Fuji users purchase the lens for photographing wildlife or sport but it’s a fantastic lens for landscape photography too.

Atmospheric mist across the landscape. Captured with Fuji X-T4 and Fujinon XF100-400mm F4.5-5.6 lens.

Atmospheric mist across the landscape. Captured with Fuji X-T4 and Fujinon XF100-400mm F4.5-5.6 lens.

With the versatile focal length range extending to 400mm I can pick out compositions in the distant landscape which would otherwise be unobtainable. However it is not all about zooming in to the distant scenery, a long focal length is is also very useful for photographing small sections of a landscape, or isolating a single subject such as a tree or much smaller parts of a scene such as a few leaves on a branch.

Beautiful light on a distant section of the landscape. Captured with Fuji X-T4 and Fujinon XF100-400mm F4.5-5.6 lens.

Beautiful light on a distant section of the landscape. Captured with Fuji X-T4 and Fujinon XF100-400mm F4.5-5.6 lens.

The standard downside to many super telephoto lenses are their size and weight. Normally I will make an informed decision to carry only the Fujinon XF100-400mm F4.5-5.6 lens when I feel it is the best lens choice for what I want to photograph on a specific day. Compared to other super telephoto lenses I have owned I find its size and weight to be very manageable.

If you’d like to see how I spend a day with my Fuji X-T4 and Fujinon XF100-400mm F4.5-5.6 lens, see the images I capture, and hear some tips for landscape photography with a super telephoto lens, you can watch a video I have created on my YouTube channel here.

My Limited Edition Prints - Landscape and Wildlife Photography from Scotland

I’ve recently added some new limited edition prints to my Shop. These are some of my favourite photographs that I’ve captured over a number of years from across Scotland. All my images are captured, printed and checked by myself. Other than the time spent capturing these photographs I enjoy taking considerable time to ensure the final prints are just right. Each photograph is printed on archival quality paper with inks which ensure it will retain its original colour quality and look for essentially a lifetime. I also include a certificate of authenticity.

Why not take a look through my prints, I’m sure you will find something that you’d get years of enjoyment from hanging in your own home. Whether a foggy woodland, a snow covered vista, a seascape, a beautiful view from the Isle of Skye or a box set containing a few prints, I hopefully have photographs for sale that will resonate with you.

Below is one of the new prints that I have recently added. This is one of my personal favourites. It is an image I visualised many years before I was able to actually capture it. I wanted to photograph this tree during heavy snowfall and it was a delight to finally see that moment years after first having the concept. The image looks wonderful in print and is a faithful representation of what was a special and very rare moment.

Landscape 1.jpg

Kase Wolverine Magnetic Circular Filters Professional Kit Review

When heading out to take landscape photography images I always take some filters with me, I don’t always use them but they have a permanent spot in my camera bag. Some scenes may not require the use of a filter, but often a scene and the resulting image can be enhanced by the use of appropriate filters. Recently I’ve wanted to reduce the size and weight of the filter kit that I carry with me, I hoped to find some filters which were compact and light but offered high optical quality.

I decided to purchase the Kase Wolverine Magnetic Circular Filters Professional Kit. This small and lightweight kit comes with a carry pouch, polariser, ND filters (3, 6 and 10 stop), adapter ring and a lens cap. The beauty of this kit is that the filters are magnetic - once you attach the adapter ring to your lens the filters simply clip on and are held by magnetic force. This, and the fact they are stackable, makes them very easy to use and saves a bit of time over other filter designs.

Recently I headed out to the coast to try out these filters, what better way to test them than take a few pictures? You can see one of my first images taken with the Kase filters below. I am very impressed with their optical quality, ease of use, and the small compact size of the entire kit. The short version of this story is that they have earned a spot in my camera bag. If you want to see my full review and demonstration of the Kase Wolverine Magnetic Filters, and some more images taken with them, then you can watch my review video on my YouTube channel here.

#kasefiltersuk

Captured using Kase Polariser and 6 stop ND filter.

Captured using Kase Polariser and 6 stop ND filter.

A Fantastic Day of Hiking and Photography in Winter

It’s always nice to capture some good images when we are out doing landscape photography but it is important to enjoy the journey too. I recently did some hiking and photography on quite a tough day, I felt I captured a few nice woodland images and I had a wonderful day even though conditions were sometimes challenging. I took 3 images, you can see one below and all 3 are in my video documenting the day which you can watch here. I found a couple of areas of the woodland which appealed to me so I wanted to capture some of the atmosphere I felt when there in my images. It’s not always easy to do that but hopefully I’ve been somewhat successful. As the day progressed the weather worsened but I was still enjoying my hike so I decided to carry on to my destination even though I knew I most likely wouldn’t be able to capture any more worthwhile images on that day. Reaching the top of the hill felt rewarding and I was glad I made the effort. Anyway, I hope you like the image below and if you want to see the rest that I captured you can watch the video on my YouTube channel. For those who are interested I captured all 3 images on my Fuji X-T3 using the XF16-55mm F2.8 R LM WR lens.

A characterful tree captured on a winters day.

A characterful tree captured on a winters day.

A Guide to Light in Landscape Photography

Landscape 1.jpg

Composition and light are two extremely important components of a good landscape image. There are many different types and directions of light, and light is constantly changing, so it is something we all need to be very aware of as landscape photographers.

Two periods of light that are well known are Blue Hour and Golden Hour. Blue Hour, as its name suggests, produces blue light. However, unlike its name suggests, it doesn’t last for as long as an hour and this light appears just before sunrise and just after sunset. I personally think the blue light is perfect for producing calm, relaxing images. Golden Hour produces a wonderfully warm and soft light which occurs just after sunrise and just before sunset. This light can really enhance the contours and details in the landscape and produces a beautiful combination of light and shadow. Similar to Blue Hour, Golden Hour may not last for an hour depending on the time of year and your location. Of course around sunrise and sunset we can often be treated to a variety of beautiful colours in the sky but it is important to check weather forecasts because the wrong type of conditions can easily prevent the colour and nice light from appearing.

The direction light is coming from can have a big impact on our images. The four most common directions are:

  • Side Lighting - light which is coming into our scene from the left or right

  • Back Lighting - light is coming from behind our subject and towards us as we face our subject

  • Front Lighting - light is coming from behind us as we face our subject and it is lighting our subject

  • Top/Overhead Lighting - light is coming from above

Throughout the main daylight hours we can encounter lots of different weather and lighting conditions - harsh light, flat light, soft diffused light, fleeting light and so on. I’ve produced a detailed video covering everything in this article and much more on my YouTube channel. If you’d like to watch you can find it here. Capturing scenes under their ideal lighting conditions is part of the joy of landscape photography and is a key part of creating successful images, I wish you good luck!

Focus, Depth of Field and Sharpness in Landscape Photography

One thing I see and hear more than anything in landscape photography is people asking how to get their images sharp from front to back. Where should they focus? What camera settings should they use? It is vital to know how to take images that are sharp throughout, but to always have that as your goal can really affect and limit your creativity. Often a scene or subject can benefit from some careful thought regarding which parts of it you would like to be sharp and in focus, and which parts you may want to appear slightly soft or out of focus. This technique can be used to make areas of interest in your image really stand out due to them being sharp and in focus. Also, the creative possibilities are great and a soft foreground or background may give your photograph a unique look and atmosphere. So next time you are out taking some images consider if whatever you are photographing should be sharp from front to back, or could the final image look better if parts of it are soft? If you’d like to hear me talk about this topic a bit more, and see me use this technique to capture an image, you can watch my video here.

Visualisation in Landscape Photography - Tips to Improve Composition and Your Photographs

Visualisation is a very important part of landscape photography. I think you need to be able to see a good image before you can take one. When you arrive at a scene you may know the potential is there for a nice composition but can you see what ingredients are required to make a great photograph? In my latest YouTube video which you can watch here I discuss visualisation in landscape photography, take a look to see me explain how it helped me capture two images that I like. For this article here are a few ideas to get you started on visualising better images:

  1. What does the scene make you feel, is there a story that you want to tell the viewer?

  2. Is the lighting correct for the scene or would it look better at a different time of day?

  3. Could the end photograph look better if captured at a different time of year?

  4. Where do you want to take the photograph from, and which focal length will work best?

Landscape 1.jpg

Landscape Photography Workshops in Scotland

Sometimes a glimpse of light is all it takes to make a scene come alive. I recently spent a day in strong wind and rain exploring and looking for something that would catch my attention. Eventually I found a scene that I really liked and I setup my camera ready to capture it how I wanted. On this stormy, overcast day the sun cast its soft glow on my scene for a few brief moments and I was able to capture an image that I really like. You can watch this here. In other news I have updated my website with details of some landscape photography workshops that I will be running in Scotland. These are in the areas of the Cairngorms National Park, Glen Affric and Torridon. If you’d like to spend a day with me in these beautiful areas, enjoy some wonderful landscape photography, and receive as much or as little tuition as you’d like then you can find out more information in the Workshops and Tuition sections of my website.

The Best Lens Focal Length Range for Landscape Photography

When doing landscape photography we can often walk for long distances and it is important to keep the weight of our camera equipment manageable. Carrying lots of lenses can certainly increase the weight of our camera bags and the effect on our energy levels is noticeable! There will be times we only want to carry a single lens with us to minimise the weight we carry, so what would be the best lens and focal length to carry? This is also a question new landscape photographers may ask before they begin purchasing camera equipment - perhaps you initially only want to buy one lens, so what is the best focal length range to start off with? Have a look here at my video in which I discuss what I think is the best focal length range in a single lens for landscape photography.

Landscape 1.jpg

Limited Edition Landscape Photography Prints from Scotland

Here on my site I have a number of limited edition landscape photography prints, and limited edition wildlife prints, from Scotland for sale. I have a range of single prints and also box sets of prints, all from Scotland. Each photograph that I sell means something to me personally and I am proud of each image that I offer as a print. Great effort and care has been put into the capture and natural edit of each photograph, and that continues with my printing and packaging process. I produce archival quality prints which will last a lifetime and included in each sale is a certificate of authenticity and some other documents which I think you will enjoy receiving. I despatch worldwide and ensure that my prints arrive in pristine condition.

Why not take a look at my landscape and wildlife limited edition prints in the Shop section of my website?

4 Landscape Photography Tips to Last a Lifetime

There are no secrets to taking landscape photography images. You do however need to know the technical details of photography and also how to operate your camera. Once you know the technical details many other factors become more important. I’ve published a video in which I give four landscape photography tips that I feel can be applied from your very first landscape photography shoot through a lifetime of taking landscape images. These tips just scratch the surface but I feel they are very important and practical. You can watch the video on my YouTube channel here.

Landscape-92.jpg

The Canon EF 16-35mm f/4L Lens - How I Use it for Ultra-Wide-Angle Landscape Photography

The Canon EF 16-35mm f/4L IS USM lens is a fantastic lens covering both ultra-wide and wide-angle focal lengths on a full frame camera. When I use this lens it is mainly to utilise the ultra-wide-angle range of focal lengths that it offers. This can result in some really interesting and dynamic images but it needs to be used correctly in the correct types of scene. In my latest YouTube video I cover in depth how I use this lens and give lots of tips and advice on ultra-wide-angle photography, you can watch my video here.

Landscape-88.jpg

The Most Difficult Sharp Image I've Ever Taken

Landscape photography can often be as much about the journey as the images we capture. Recently I headed off hoping to capture an image of snow covered mountains which involved a difficult walk and a steep ascent through hills and mountains. Although cold, the weather at ground level was pleasant for the time of year, but as I climbed higher I was met with increasingly strong winds and a temperature which was rapidly dropping. At the top of my climb the wind was so strong that I struggled to walk and it was impossible to steady my tripod enough to capture the image that I wanted. I had to settle for a different composition and faced a real challenge just to capture a sharp image let alone one I was happy with. On this day I didn’t capture one of my best images but I created memories of a day that I won’t forget. You can watch my journey here.

Choosing a Fine Art Paper for Printing Landscape Images

How do you select a paper to print your landscape images on? What factors should be considered when thinking about a paper choice? In my new YouTube video I show the Fotospeed papers I use, I display and discuss a number of my framed images, and I give my thoughts on selecting a fine art paper type. You can watch the video here.

Framed Image-1.jpg

Canon EF 70-200mm f/4L USM Lens - Testing and Review

I recently purchased the Canon EF 70-200mm f/4L USM lens (affiliate link to lens on Amazon https://amzn.to/2UiTwjV) and decided to make a video discussing why I bought this lens and also to review it. I travel to a couple of different locations including up a mountain in tough conditions to test this lens thoroughly. If you want to hear my thoughts on this lens you can watch the video here.

Landscape-75.jpg

Photography in an Ancient Woodland - Woodland Photography Tips and Ideas

I’m just back from a trip to an ancient woodland where I enjoyed some fulfilling photography but faced challenges in terms of the woodland itself and the weather. I created a video showing my experience and I give some tips and ideas to hopefully help you in your own woodland photography. You can watch the video on my YouTube channel here.

Landscape-73.jpg